Mastering How to Clean Oil Paintings Safely
how to clean oil paintings

Mastering How to Clean Oil Paintings Safely

Unlock the secrets to safely revitalizing your oil paintings, preserving their beauty for generations to come.

Start Cleaning Safely

Key Takeaways

  • ✓ Always test cleaning solutions on an inconspicuous area first.
  • ✓ Never use harsh chemicals, water, or abrasive materials on oil paintings.
  • ✓ Professional conservation is recommended for valuable or delicate artworks.
  • ✓ Dusting with a soft brush is the safest first step for routine care.

How It Works

1
Assess the Artwork

Carefully examine the painting for its condition, identifying areas of grime, damage, and the type of varnish. This initial assessment guides your cleaning approach and helps prevent further harm.

2
Gentle Dust Removal

Using a soft, dry brush or cotton ball, gently remove loose surface dust and cobwebs. This crucial first step prevents abrasive particles from scratching the paint surface during deeper cleaning.

3
Spot Test Cleaning Agents

Before applying any cleaning solution to the main surface, test it on a tiny, hidden area of the painting. Observe for any adverse reactions like color lift or dulling, ensuring the solution is safe.

4
Controlled Cleaning Application

Apply chosen cleaning agents sparingly with soft cotton swabs, working in small, controlled sections. Change swabs frequently to avoid spreading dirt and always wipe away residue promptly.

Understanding the Delicate Nature of Oil Paintings

Close-up of a colorful artist's palette with various paint blobs and textures. 
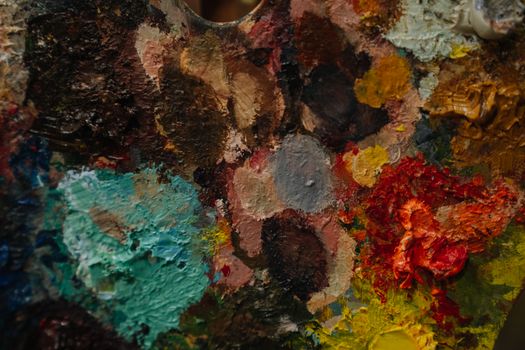
Photo: Huy Nguyễn / Pexels
Oil paintings, renowned for their rich textures and vibrant colors, are complex works of art comprised of multiple layers: the support (canvas, wood panel), ground, paint layers, and often a final varnish. Each layer plays a crucial role, and each is susceptible to damage from environmental factors, improper handling, and incorrect cleaning methods. Understanding this delicate structure is paramount before embarking on any cleaning endeavor. The oil paint itself is made from pigments suspended in a drying oil, typically linseed oil. Over time, this oil oxidizes and becomes brittle, making the paint layers vulnerable to cracking, flaking, and abrasion. The varnish layer, applied years or even decades after the paint has dried, serves as a protective barrier against dirt, dust, and environmental pollutants, while also enhancing the painting's visual depth and saturation. However, varnish itself can yellow, darken, or become cloudy over time, obscuring the original vibrancy of the artwork. This yellowing is a natural aging process, often intensified by exposure to light, smoke, and pollutants. Attempting to clean an oil painting without a thorough understanding of these layers and their vulnerabilities is akin to performing surgery without medical knowledge – the risk of irreversible damage is extremely high. Many common household cleaners contain harsh chemicals, abrasives, or excessive moisture, all of which can severely harm oil paint and varnish. For instance, water can cause swelling of the canvas, crack the paint, or leave unsightly tide marks. Solvents not specifically designed for art conservation can dissolve paint, strip varnish unevenly, or leave a sticky residue that attracts more dirt. Even seemingly innocuous actions like vigorous rubbing can abrade the paint surface, leading to permanent loss of detail and color. This is why a cautious, informed approach is not just recommended, but absolutely essential. Before you even consider touching your painting with a cleaning agent, take the time to research, assess, and, if necessary, consult with a professional. The value of an oil painting isn't just monetary; it often holds immense sentimental or historical significance, making its preservation a responsibility not to be taken lightly. Ignoring the inherent fragility of these artworks can lead to irreparable harm, diminishing their aesthetic appeal and historical integrity. For further insights into art preservation, explore resources on art conservation techniques.

Essential Tools and Preparations for Safe Cleaning

Artist sculpting a large clay bust in an art studio, showcasing creativity and craftsmanship. 
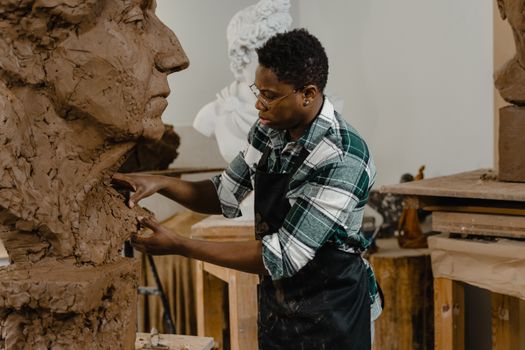
Photo: Tima Miroshnichenko / Pexels
Before you begin the cleaning process, assembling the right tools and preparing your workspace are critical steps to ensure both safety and effectiveness. Rushing this stage can lead to mistakes that are difficult, if not impossible, to rectify. First and foremost, you will need a clean, well-lit, and dust-free workspace. Lay down a clean, soft cloth or blanket on a sturdy table to protect both the painting and your work surface. Good lighting, preferably natural daylight or a balanced artificial light source, will help you clearly see the grime and monitor your progress without straining your eyes. For dust removal, a very soft, natural-bristle brush (like a cosmetic brush or a dedicated art brush) is indispensable. Avoid synthetic brushes as they can be too stiff. Alternatively, large, soft cotton balls can be used. For deeper cleaning, you'll need multiple packs of medical-grade cotton swabs (Q-tips), as you will be using a fresh swab for each small section and discarding it once it shows dirt. This prevents redistributing grime across the painting. Regarding cleaning solutions, this is where extreme caution is advised. For general surface grime, a very dilute solution of saliva (yes, saliva!) can be surprisingly effective due to its enzymatic properties, but it must be fresh and applied carefully. More commonly, specialized art cleaning solutions or solvents might be considered, but *only* if you have prior experience or have consulted with a conservator. Isopropyl alcohol (rubbing alcohol) is often mentioned, but it can be too strong and should only be used in very specific, highly diluted concentrations, and again, with extreme caution. Under no circumstances should you use household cleaners like Windex, furniture polish, or abrasive cleaners. These contain chemicals that can permanently damage the paint and varnish. Always have a clean, dry, soft cloth or paper towel nearby to blot any excess moisture. A magnifying glass can be useful for examining small areas and assessing the effectiveness of your cleaning. Finally, and perhaps most importantly, have a plan for disposal of used swabs and solutions. Safety goggles and gloves are also recommended to protect yourself from any cleaning agents you might be using. Remember, the goal is to remove grime, not to remove paint or varnish. Thorough preparation minimizes risks and maximizes the chances of a successful and safe cleaning outcome for your valuable artwork.

Step-by-Step Guide to Safely Cleaning Your Oil Painting

Cleaning an oil painting is a meticulous process that requires patience, a steady hand, and an understanding of the artwork's vulnerabilities. This step-by-step guide outlines a generally safe approach for surface cleaning, but remember, for valuable or antique paintings, professional conservation is always the safest route. **Step 1: Initial Assessment and Photography.** Before touching the painting, examine it thoroughly. Look for cracks, flaking paint, areas of damage, and the overall condition of the varnish. Take high-resolution photographs of the painting from different angles, both before and during the cleaning process. These photos serve as a crucial record of its original state and can help you track your progress or identify any unintended changes. Note any areas that appear particularly delicate or discolored. **Step 2: Gentle Dust Removal.** Begin by carefully removing loose surface dust. Hold the painting upright or at a slight angle. Using a very soft, dry, natural-bristle brush, gently sweep across the surface, moving from top to bottom. Do not press hard; the goal is to dislodge dust, not to scrub. For stubborn dust or cobwebs, a small, soft cotton ball can be used with a very light touch. Never use a vacuum cleaner directly on the painting, as the suction can lift paint flakes. **Step 3: The Patch Test – Your Most Critical Step.** This step cannot be overstated. Choose an inconspicuous area of the painting, preferably along an edge or a dark corner where the paint is stable and any reaction would be minimally visible. Dip a medical-grade cotton swab into your chosen cleaning solution (e.g., a highly diluted art-specific cleaning solution or saliva). Gently roll the swab over a tiny area, observing the cotton for any signs of color lift from the paint. Look for yellowing on the swab, which indicates dirt and grime removal. If the swab picks up paint color, stop immediately. Wait a few minutes to see if there's any dulling, softening, or other adverse reactions on the tested spot. If the test area shows no negative effects and effectively removes grime, you can proceed with extreme caution. **Step 4: Controlled Cleaning Application.** Working in small sections (no larger than a square inch), lightly moisten a fresh cotton swab with your cleaning solution. Gently roll the swab over the surface, applying minimal pressure. The goal is to lift dirt, not to rub it in or dissolve the paint. As soon as the swab shows dirt, discard it and use a new one. This is why you need many swabs. After cleaning a small section, immediately follow with a clean, *slightly* damp (with distilled water, if using a solvent-based cleaner) swab to remove any residual cleaning solution, then gently blot dry with a clean, soft cloth. Work systematically across the painting, section by section, constantly monitoring for any changes. It’s better to clean too little than too much. Often, a significant improvement can be seen with just a light surface cleaning. For areas with very stubborn grime, repeat the process with fresh swabs, but never scrub or apply excessive force. Remember, the goal is preservation and gentle revitalization, not aggressive restoration. For deeper insights into art care, consider exploring resources on preventative art conservation.

Common Mistakes to Avoid and When to Call a Professional

Cleaning an oil painting can be a rewarding process, but it's fraught with potential pitfalls if not approached with the utmost care. Avoiding common mistakes is just as important as knowing the correct techniques. Here’s a list of critical errors to steer clear of: * **Using Household Cleaners:** Never use Windex, furniture polish, dish soap, or any other household cleaner. These products contain chemicals (ammonia, silicones, waxes, strong detergents) that are highly corrosive to oil paint and varnish, leading to irreversible damage, discoloration, or a sticky residue that attracts more dirt. * **Excessive Moisture or Water:** Water is generally an enemy of oil paintings. It can cause swelling of the canvas support, leading to paint cracking, and can even leach pigments or leave permanent watermarks. While some conservators use specific aqueous solutions, these are highly controlled and not for amateur use. * **Abrasive Materials:** Sponges, rough cloths, or even stiff brushes can scratch or abrade the paint surface, especially if the paint is already brittle or flaking. Always use only soft, non-abrasive materials like cotton swabs or very soft artist brushes. * **Rubbing Too Hard:** Applying too much pressure can lift paint, damage the varnish, or embed dirt deeper into the texture of the painting. Cleaning should always be done with a light, rolling motion, letting the cleaning agent do the work. * **Ignoring the Patch Test:** Skipping the patch test is perhaps the most dangerous mistake. Without it, you have no way of knowing how the cleaning solution will react with your specific painting, which could result in instant, irreparable harm. * **Cleaning a Damaged Painting:** If your painting has flaking paint, significant cracks, tears, or structural damage, cleaning it yourself will almost certainly worsen the problem. These issues require professional intervention before any cleaning can be considered. * **Attempting Varnish Removal:** Removing old, yellowed varnish is an extremely delicate process that requires specialized solvents and expertise. Amateurs attempting this risk dissolving the paint layers beneath. This is strictly a job for a trained conservator. **When to Call a Professional:** While this guide provides information for basic, cautious surface cleaning, there are many instances where professional art conservation is not just recommended but absolutely necessary: * **Valuable or Antique Paintings:** If the painting has significant monetary, historical, or sentimental value, do not risk cleaning it yourself. A professional conservator has the knowledge, tools, and experience to handle such works safely. * **Complex Grime or Discoloration:** If the grime is deeply embedded, the varnish is heavily yellowed, or there are signs of mold, smoke damage, or other complex issues, a conservator can properly assess and treat the problem. * **Structural Damage:** Any painting with tears, holes, flaking paint, canvas sagging, or stretcher bar marks needs a conservator's attention to stabilize the artwork before any cleaning can even be contemplated. * **Uncertainty or Lack of Experience:** If you are unsure about any step, or if you lack confidence in your ability to perform the cleaning safely, it is always best to consult a professional. They can offer advice, perform the cleaning, or even provide workshops. Ignoring these warning signs can lead to the permanent loss of an artwork's beauty and value, making professional intervention a worthwhile investment.

Comparison

FeatureProfessional ConservatorDIY Gentle DustingDIY Deep Cleaning (Caution)
Risk of DamageMinimalVery LowHigh
EffectivenessExcellent (all issues)Good (surface dust)Moderate (surface grime)
CostHighVery LowLow (materials)
Suitable for Valuables
Varnish Removal
Paint Restoration
Required ExpertiseExtensiveBasicModerate to High

What Readers Say

"This guide completely changed how I approach my inherited oil paintings. The emphasis on gentle dusting and patch testing saved me from making costly mistakes. My grandmother's portrait looks so much brighter now, without any damage."

Eleanor Vance · Boston, MA

"I was hesitant to touch my antique landscapes, but this article provided clear, actionable steps. The advice on using cotton swabs and working in small sections was invaluable. I saw a noticeable improvement in clarity and color."

Robert Chen · Seattle, WA

"After reading this, I successfully cleaned a grimy flea market find. The colors underneath the dirt were stunning! It instilled the confidence to carefully clean without fear of ruining the art. The 'when to call a professional' section was also very helpful."

Sophia Rodriguez · Austin, TX

"The guide is comprehensive, though I still feel some trepidation about using any liquid on my more valuable pieces. For general dusting, it's perfect, but for deeper cleaning, I might still defer to a pro, as suggested."

David Miller · Denver, CO

"My art history professor recommended this article for understanding basic oil painting care. The detailed explanations and warnings about common mistakes are excellent for anyone who owns or works with oil paintings. It's a fantastic resource."

Jessica Lee · Miami, FL

Frequently Asked Questions

What is the safest way to clean an old oil painting?

The safest initial step for cleaning an old oil painting is gentle surface dusting with a very soft, dry brush or cotton ball to remove loose particles. For deeper cleaning, specialized art-grade solutions applied with cotton swabs in small, tested areas can be used, but professional conservation is always recommended for valuable or antique pieces to avoid irreversible damage.

Can I use water or household cleaners on an oil painting?

No, you should never use water or common household cleaners like Windex, dish soap, or furniture polish on an oil painting. Water can cause cracking and swelling, while household cleaners contain harsh chemicals that can permanently damage the paint layers, varnish, and overall integrity of the artwork, leading to irreversible discoloration or paint loss.

How do I remove yellowed varnish from an oil painting?

Removing yellowed varnish from an oil painting is an extremely delicate and complex process that requires specialized solvents, expert knowledge, and often, a controlled environment. This task should only be undertaken by a professional art conservator to prevent damage to the underlying paint layers. Attempting varnish removal yourself carries a high risk of irreversible harm.

Is professional oil painting cleaning expensive?

The cost of professional oil painting cleaning varies significantly depending on the painting's size, condition, the type of grime, and the conservator's expertise. While it can be a significant investment, it's often far less costly than attempting a DIY cleaning that results in irreparable damage, which could devalue the artwork or necessitate more extensive, expensive restoration.

How does professional oil painting cleaning differ from DIY methods?

Professional oil painting cleaning involves conservators who have extensive training in art history, chemistry, and conservation techniques. They use specialized tools, controlled environments, and reversible solutions tailored to each artwork's unique composition and condition, whereas DIY methods are limited to very gentle surface cleaning with a high risk of damage if not executed with extreme caution and knowledge.

Who should consider cleaning their own oil paintings?

Individuals with non-valuable or sentimental oil paintings that only require very light surface dusting to remove loose grime may consider cleaning them, provided they follow extremely cautious, gentle methods and conduct thorough patch tests. Anyone dealing with valuable, antique, or visibly damaged paintings should always consult a professional art conservator.

What are the risks of improperly cleaning an oil painting?

Improperly cleaning an oil painting carries numerous risks, including irreversible paint loss, scratching, discoloration, cracking of the paint layers, dissolving of the varnish or even paint, and leaving behind sticky residues that attract more dirt. Such damage can significantly diminish the artwork's aesthetic appeal, historical value, and monetary worth.

Are there new technologies for cleaning oil paintings?

Yes, art conservation is an evolving field. New technologies and methods for cleaning oil paintings include laser cleaning for specific types of grime, solvent gels that allow for more controlled application and removal of cleaning agents, and advanced analytical techniques to precisely identify paint and varnish compositions. These innovations are primarily used by professional conservators.

Armed with this comprehensive guide, you're now better equipped to understand how to clean oil paintings safely and effectively. Remember, patience and caution are your best tools. For valuable or delicate artworks, always consult a professional conservator to ensure the longevity and beauty of your cherished pieces.

Topics: how to clean oil paintingsoil painting restorationart conservation tipscleaning old oil paintingsoil painting care
Leo List
Brampton weed
Adultwork